
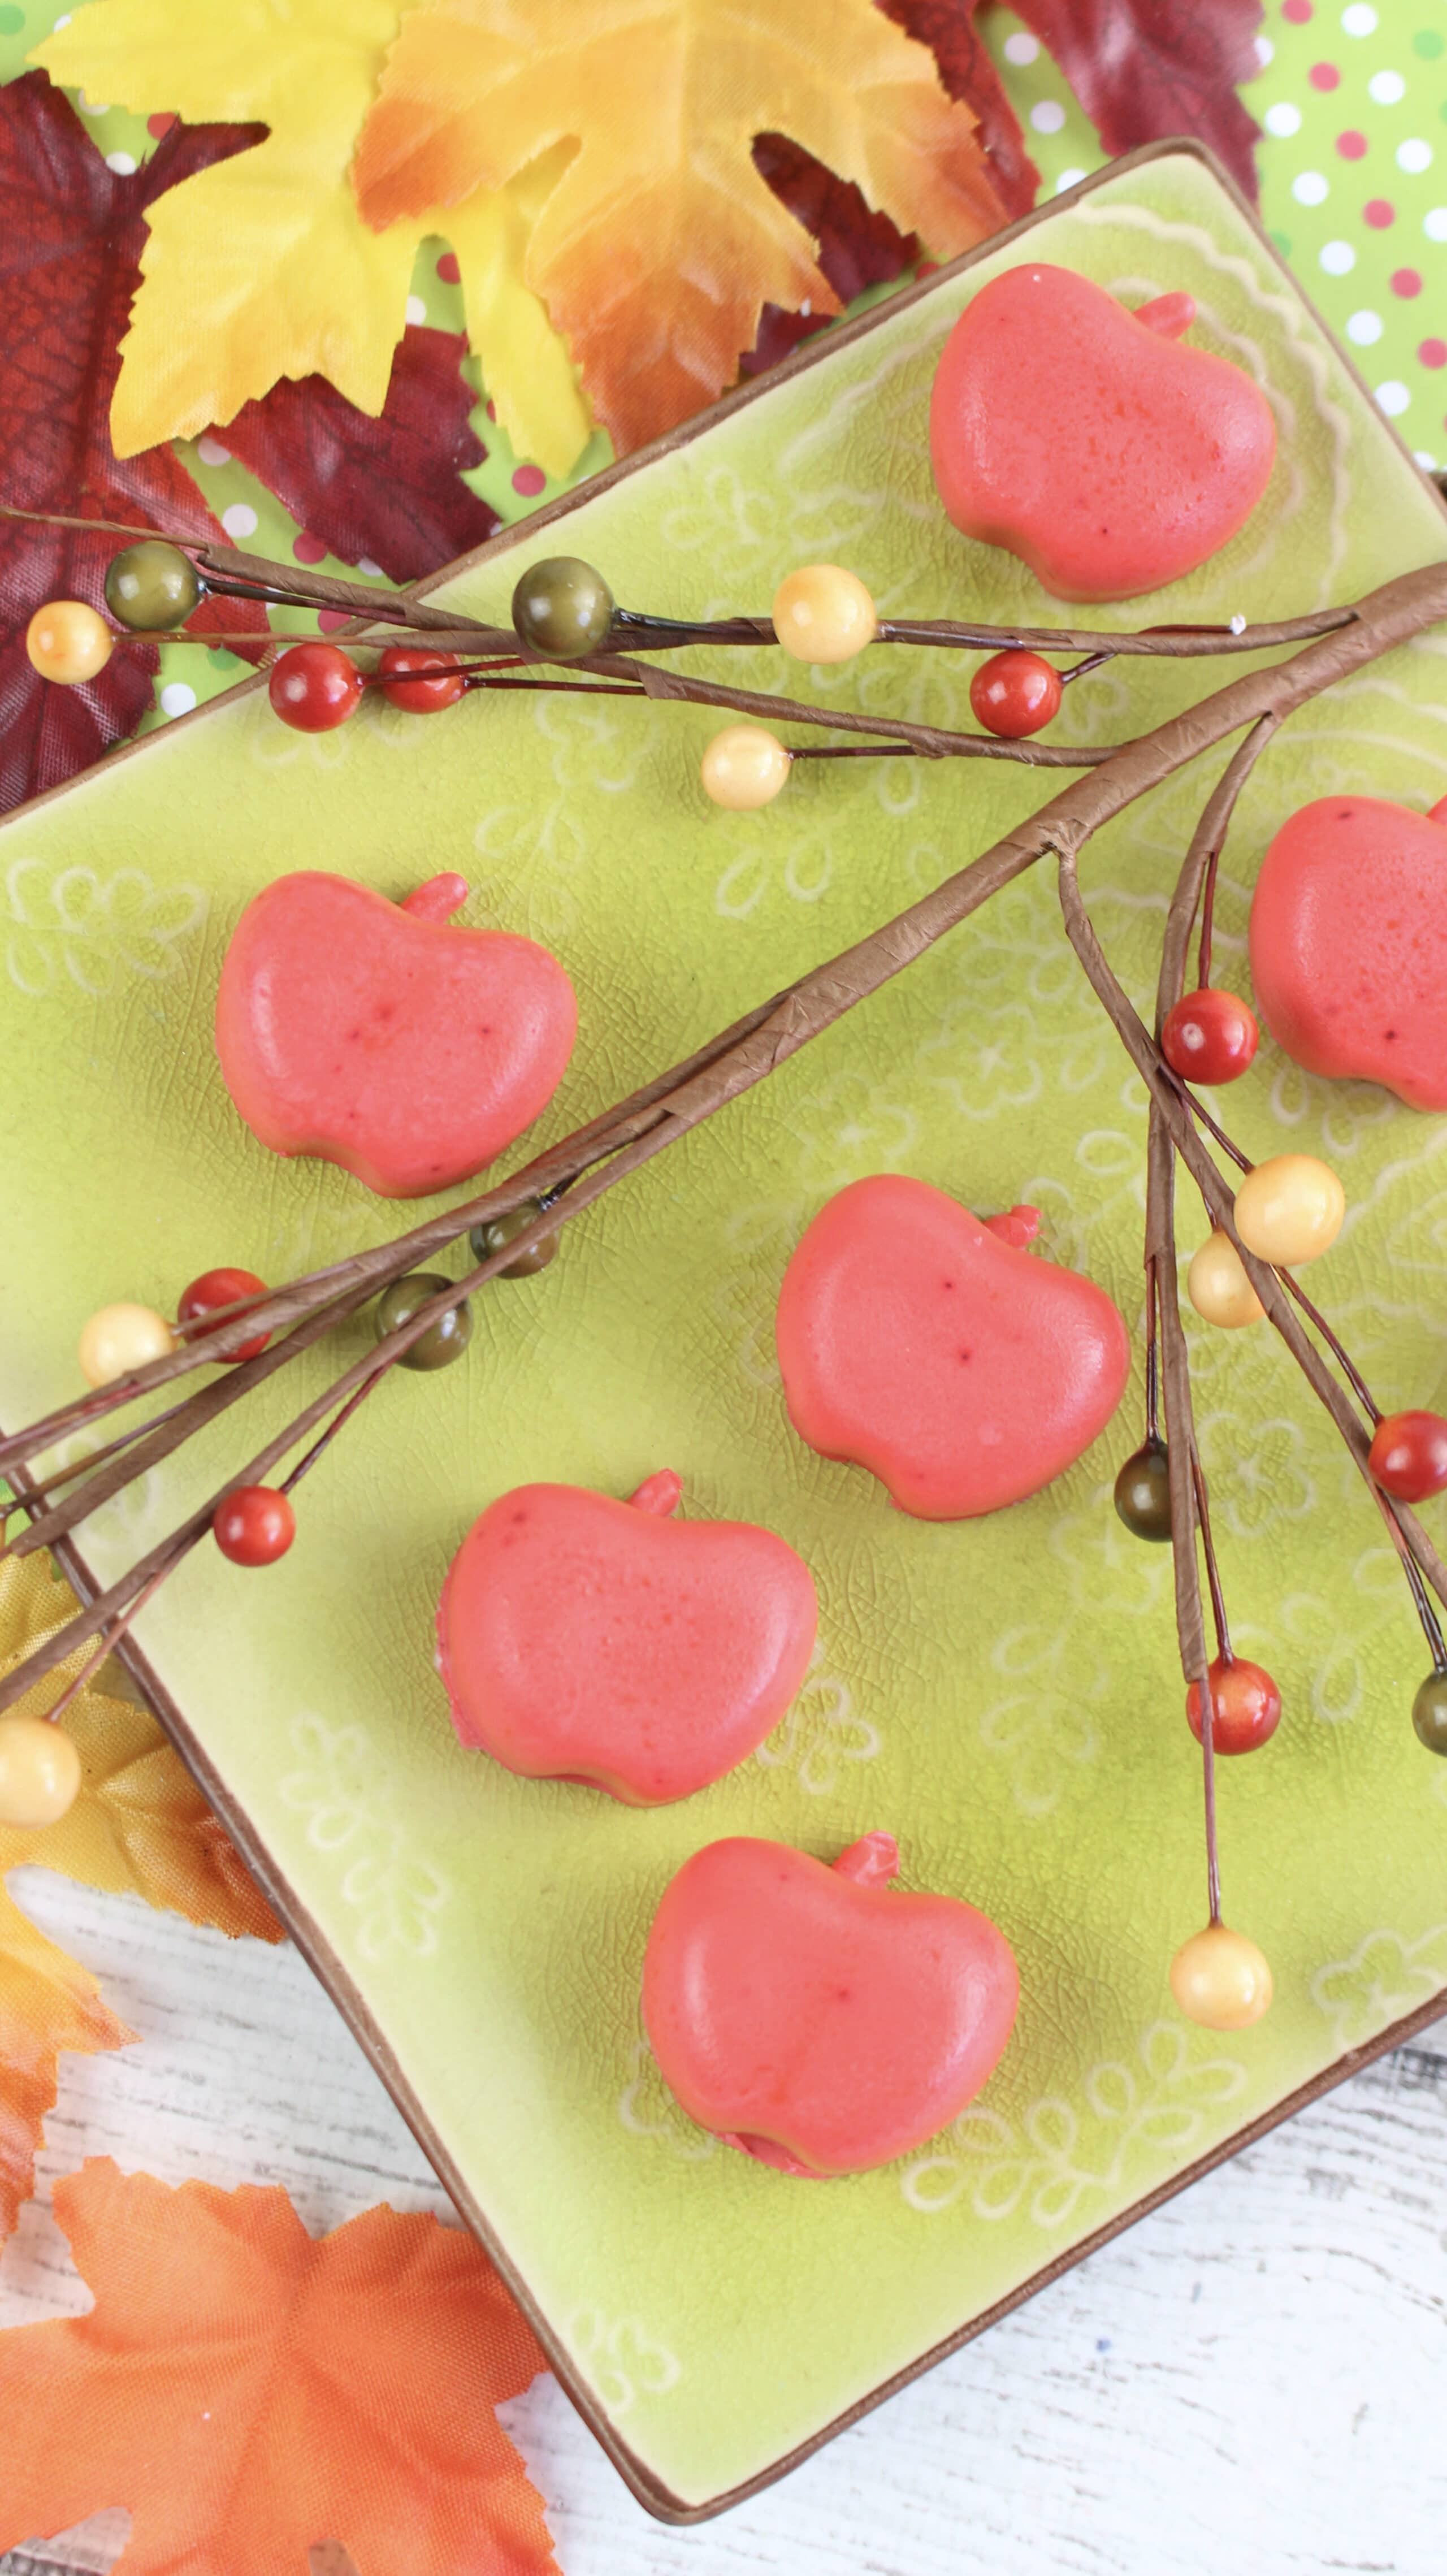
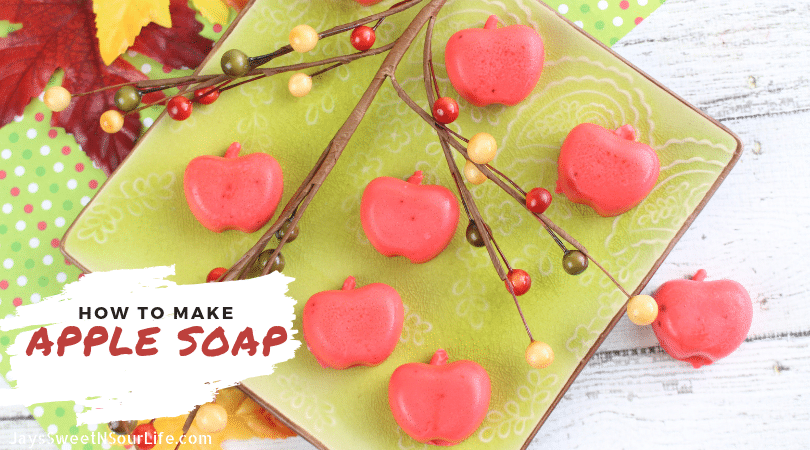
Learn How To Make Apple Soap using this quick and Easy DIY Soap Recipe. These apple scented and shaped soaps are the perfect gift for teachers, or for someone you love.
How To Make Apple Soap – Easy DIY Soap Recipe
After a gorgeous day at our local farms picking fresh apples, this apple soap recipe came about. Our family loves to pack up and head out for the day to our local farms and pick fresh apples and sip on freshly pressed apple cider! If you have never tried freshly pressed, you are missing out, the flavors are rich, spiced up, and just outstanding down to the last sip.
I wanted to share how to make apple soap with you all so that you can learn how easy it is to make your own soap. Plus, this apple soap is perfect for gifts for around the holidays. We all spend time washing our hands throughout the day, so a gift of a pretty bar of soap is a great way to welcome the scents of fall.
Best Apple Soap Recipe
This DIY soap recipe is straightforward, and even if you have never made soap before, I think you will have no trouble at all! This offers a crisp, fresh apple scent that will linger for a bit on the skin. It is so refreshing, and to me a scented hand soap always makes hand washing a bit more fun, especially for little hands.
This soap is not only pretty but lathers nicely and gives your hand a smooth feel once you are done. One tip I learned years ago is when all those little soap pieces are close to being done, toss them in a small mesh bag and use that to get all the use out of the soap.
The mesh bag allows water in, while still giving you a good lather to use up the smaller pieces. Or sit your soap on a sponge so all the soap drips down into the sponge and you can use it that way. Just make sure to change out or clean your sponge at least once a week if you do that.
Have you ever made soap before?
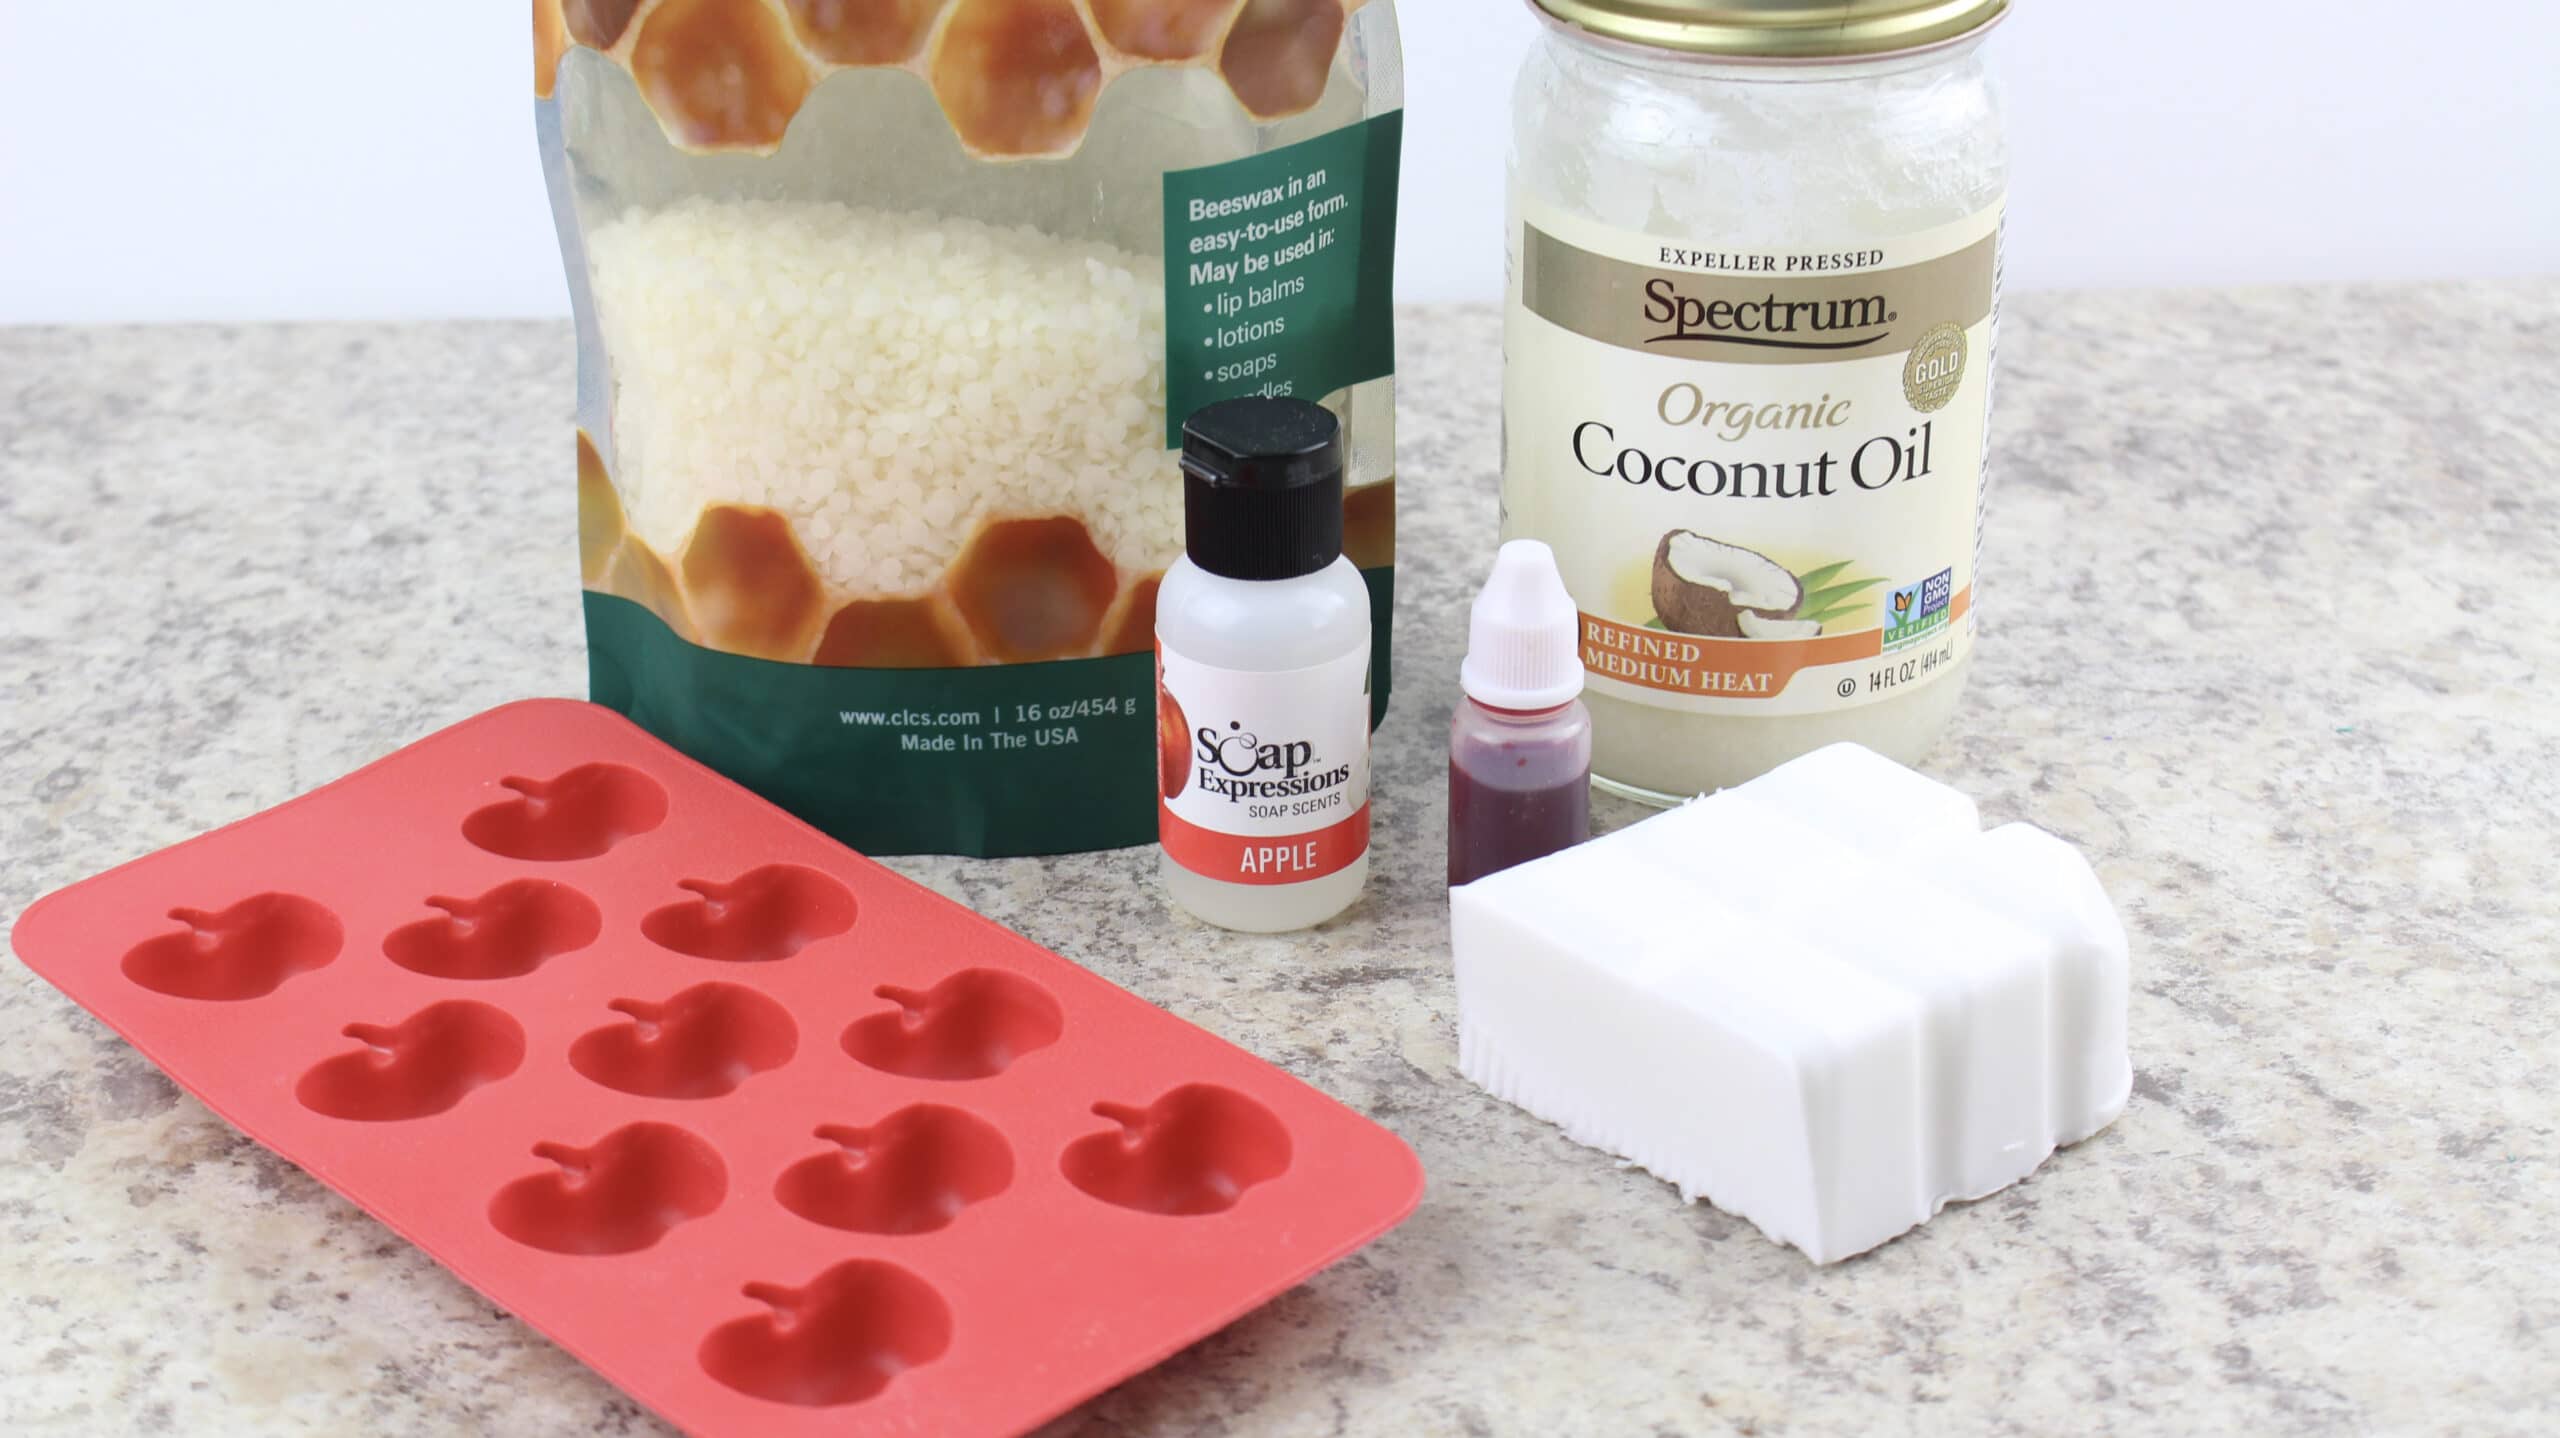
Homemade Apple Soap Supplies
- shea butter soap base
- beeswax pellets
- coconut oil
- apple soap fragrance
- red soap colorant
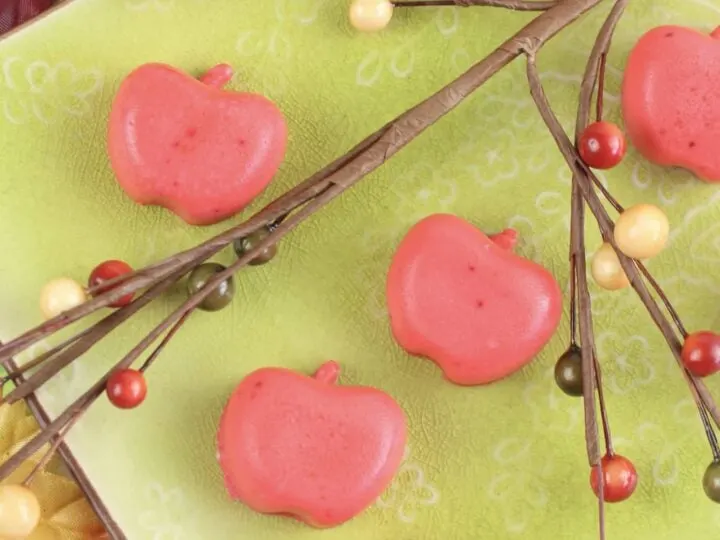
- apple-shaped soap mold
Make this easy homemade apple scented soap using just a few supplies you can find at your local arts and crafts store. Or you can purchase these supplies online, this easy homemade soap tutorial shows you how to make your very own apple scented and shaped soaps.


How to make Apple Scented Soap
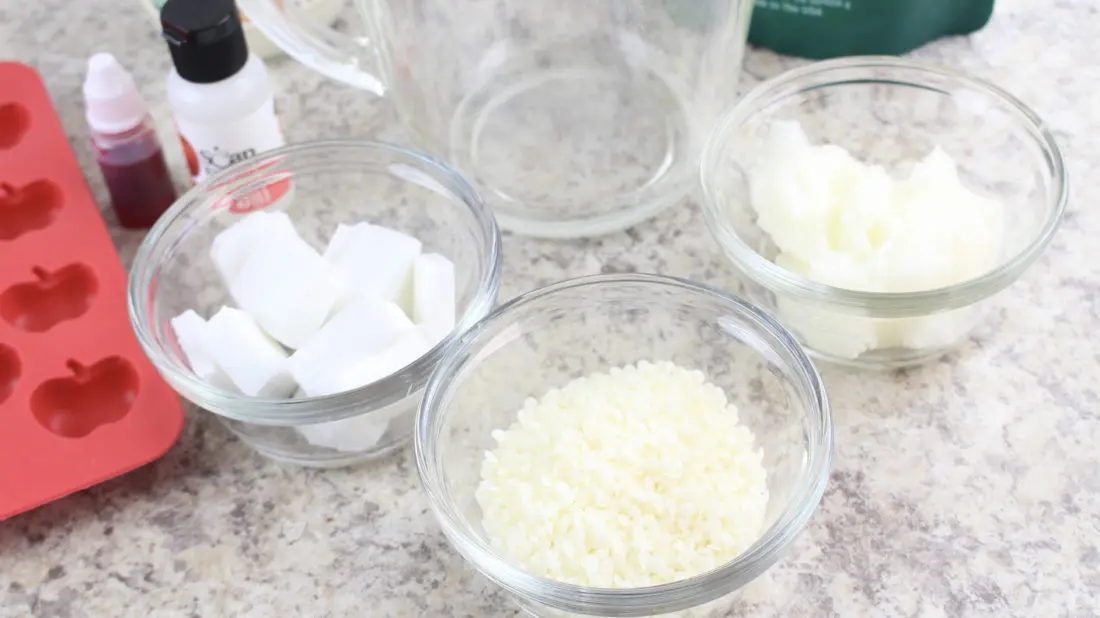
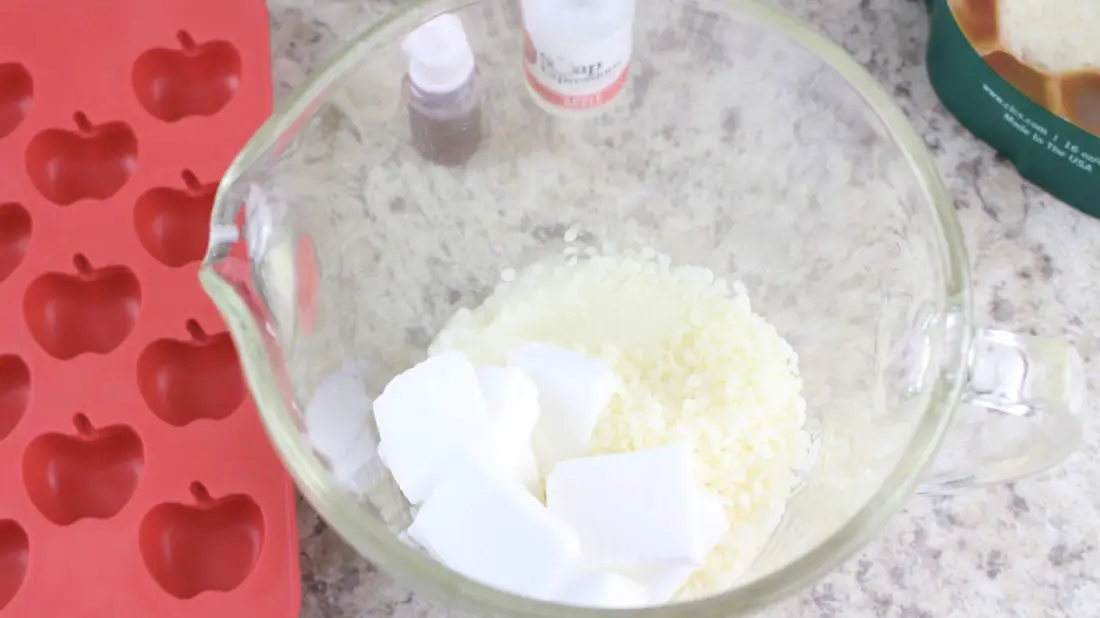
Add the shea butter, coconut oil, and beeswax pellets to a microwave safe bowl. (I used a large Pyrex measuring cup). Microwave on high in 30-second increments until completely melted. (This took me 3 times until it was melted but microwave wattages vary). The beeswax will take the longest to melt. Remove from microwave and stir well.
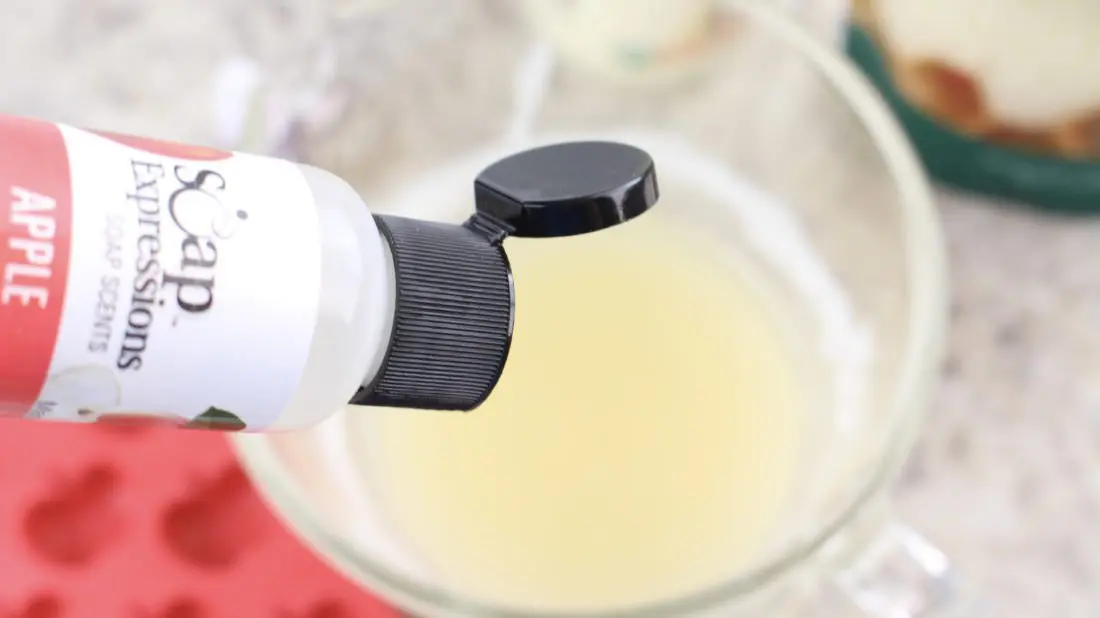
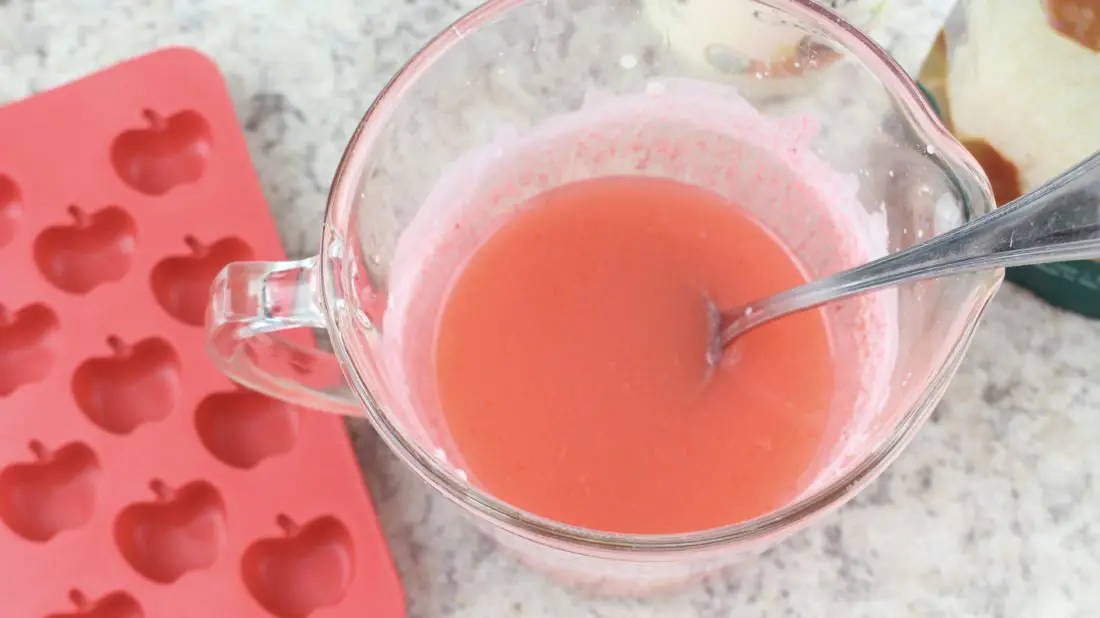
Add the apple soap fragrance and red colorant and stir well to distribute. Add more colorant depending on the shade of red you desire.


Add the Soap to the Molds
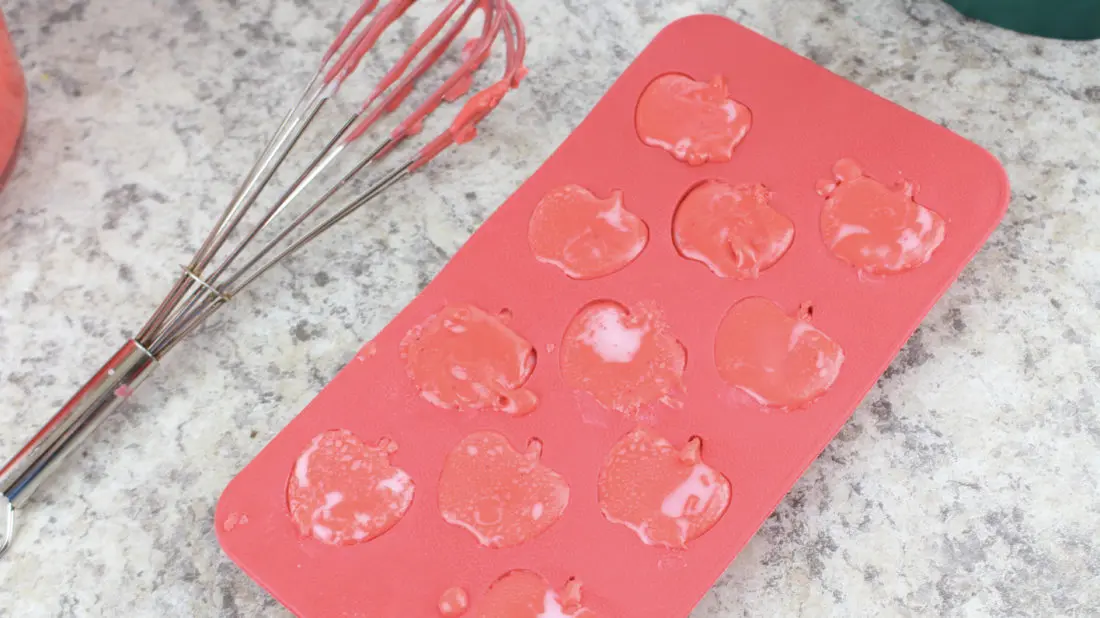
Immediately pour the melted lotion into your silicone molds, filling up to the top. This lotion actually begins to solidify very quickly so you need to keep that in mind while you are filling the molds.
Chill for 30 minutes to allow the apple lotion bars to completely harden.
Popular Apple Recipes
Don’t forget to checkout some of my other most popular apple recipes on my blog. Like my Instant Pot Apple Sauce, it’s the best apple sauce recipe you will ever find, and takes only minutes to prepare. Throw in your fall apple harvest into your instant pot for a healthy apple sauce recipe that the kids will love.
How To Make Apple Soap Recipe

Materials
- 1/3 cup shea butter soap base
- 1/3 cup beeswax pellets
- 1/3 cup coconut oil
- 10-12 drops apple soap fragrance
- 8-10 drops red soap colorant
Instructions
- Add the shea butter, coconut oil, and beeswax pellets to a microwave safe bowl. (I used a large Pyrex measuring cup). Microwave on high in 30-second increments until completely melted.
- (This took me 3 times until it was melted but microwave wattages vary). The beeswax will take the longest to melt. Remove from microwave and stir well.
- Add the apple soap fragrance and red colorant and stir well to distribute. Add more colorant depending on the shade of red you desire.
- Immediately pour the melted lotion into your silicone molds, filling up to the top. This lotion actually begins to solidify very quickly so you need to keep that in mind while you are filling the molds.
- Chill for 30 minutes to allow the apple lotion bars to completely harden.